The three kinds of cover
loadmate keeps three kinds of warranty, and the type you choose is just a label that helps you recognise the record later. Pick whichever fits the paperwork in front of you.
- Manufacturer. The warranty that came with the vehicle or trailer from the maker, such as the cover on a new caravan from the factory.
- Extended. Extra cover you bought from a dealer or a third-party provider, on top of the maker’s warranty. This is the one people most often forget they paid for.
- Component. Cover on a specific part, such as the fridge, the awning, the hot water system, or the solar regulator. These usually come with their own appliance card or receipt.
Add a coverage record
Open the Add coverage sheet from the Warranty hub. From the More tab choose Warranty, then tap Add warranty coverage. The details all come straight off your purchase paperwork or the appliance card, so it helps to have them to hand before you start.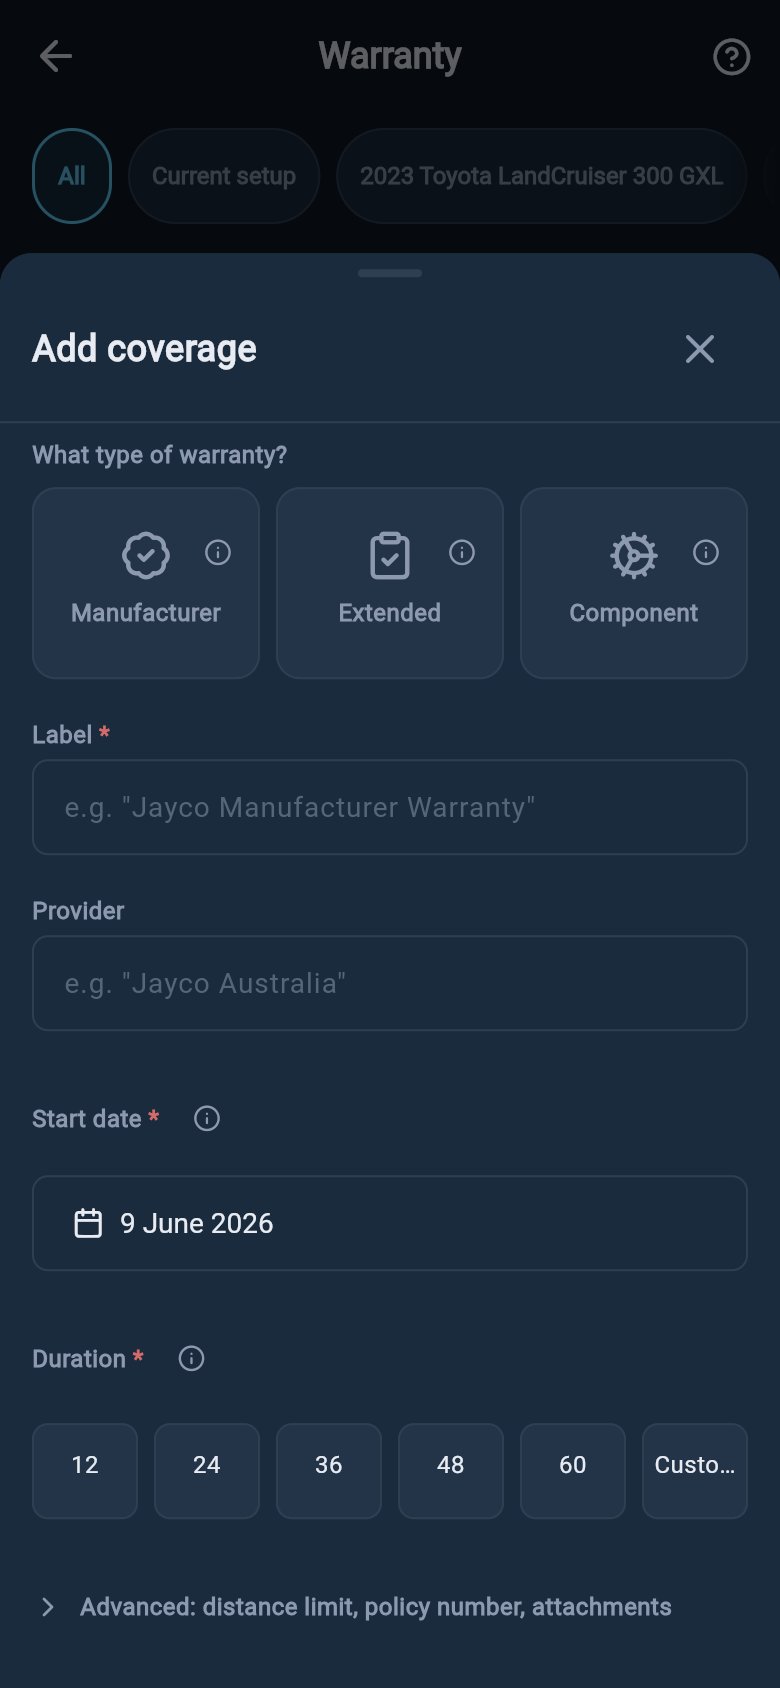
Open the sheet and pick the type
Tap Add warranty coverage on the hub, then choose manufacturer, extended, or component at the top of the form. Give the record a short label so you recognise it later, such as “Dometic fridge warranty”.
Enter the start date and how long it lasts
Set the Start date — usually the purchase date on your receipt — and the Duration in months. These two are all loadmate needs to start the countdown.
Add anything else worth keeping (optional)
Open the Advanced section to record the provider, a policy number, a distance limit, notes, or to attach a photo or PDF of the paperwork. Every one of these is optional; skip what you do not have.
What each field means
Most of the form is optional. Only the type, the start date, and the duration are needed to start a countdown; everything else is there to make the record more useful to you later. Each field has a small i icon beside it that opens a one-line explanation, so you are never left guessing what a box is asking for.- Label. A short name for the record, so you can tell your fridge cover from your awning cover at a glance.
- Start date. Usually the purchase date from your receipt. This is where the countdown begins.
- Duration. How many months the warranty lasts from the start date. loadmate adds this to the start date to work out when the cover ends.
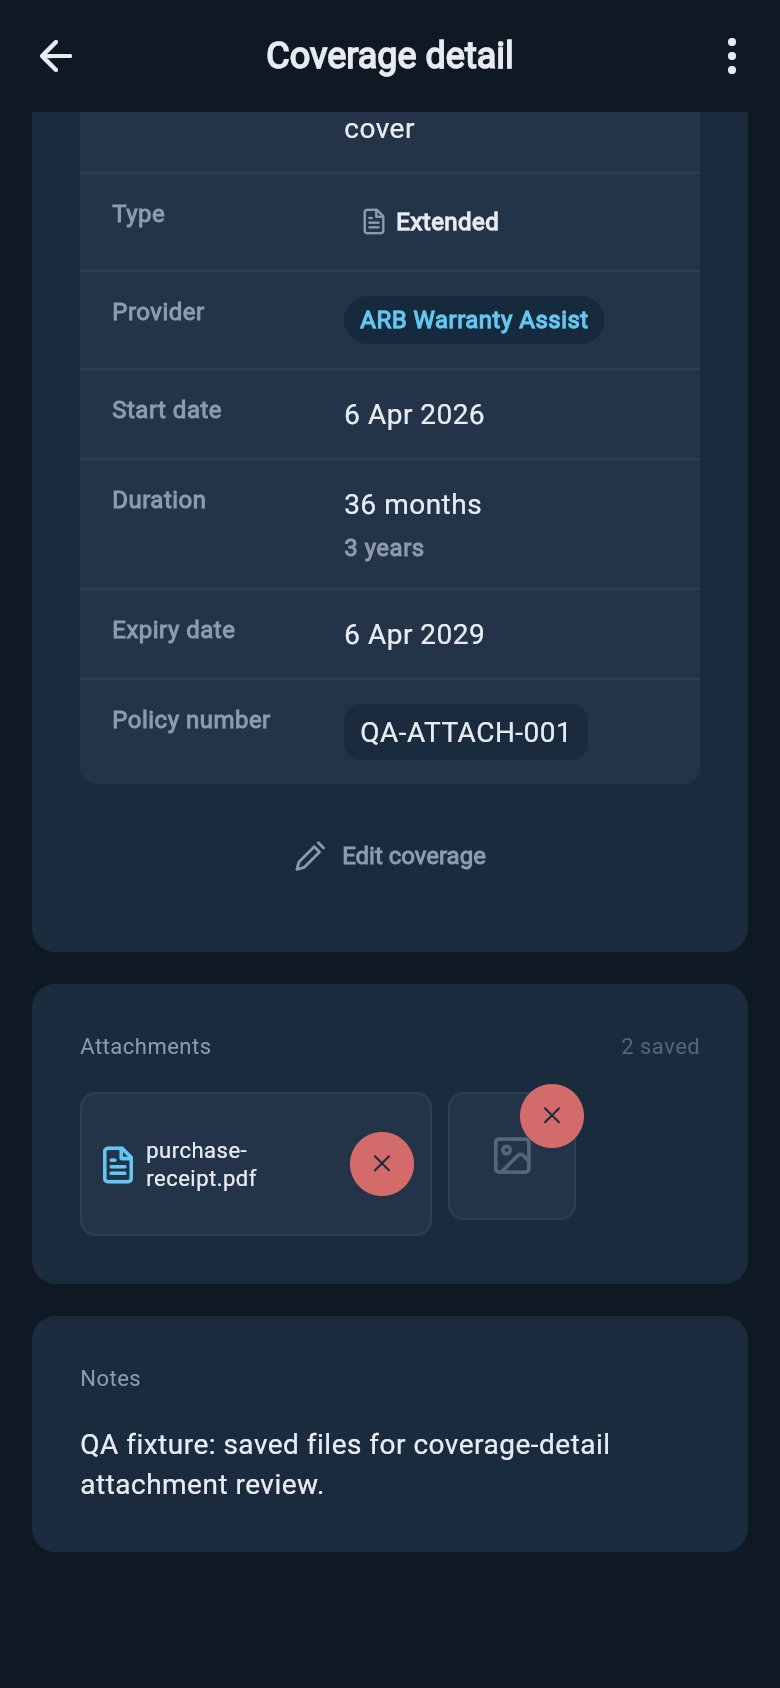
- Provider. Who the cover is with, such as the maker, the dealer, or an insurer. It is a label on your own record; loadmate never contacts them.
- Policy number. The reference printed on your warranty document or receipt, handy to have on file if you ever need to quote it.
- Distance limit. The maximum distance the warranty covers, if it has one, shown in kilometres or miles to match your region.
- Start odometer. Your distance reading when the warranty began. This box only appears once you have entered a distance limit.
- Notes. Anything else worth remembering about the cover — where the paperwork lives, who to call, or exactly what is included.
- Attachments. Keep the paperwork with the cover. Tap Add photo or Add PDF to save the warranty document, the receipt, or the appliance card straight onto the record — up to five files, each up to 10 MB. You can open or remove them later from the coverage record.
Some warranties expire after a set distance as well as a set time. loadmate stores and shows a distance limit so you have the figure on the record, but the warnings count down by time only. There is no second countdown watching your odometer, so treat the distance limit as a note to yourself rather than something the app will alert you about.
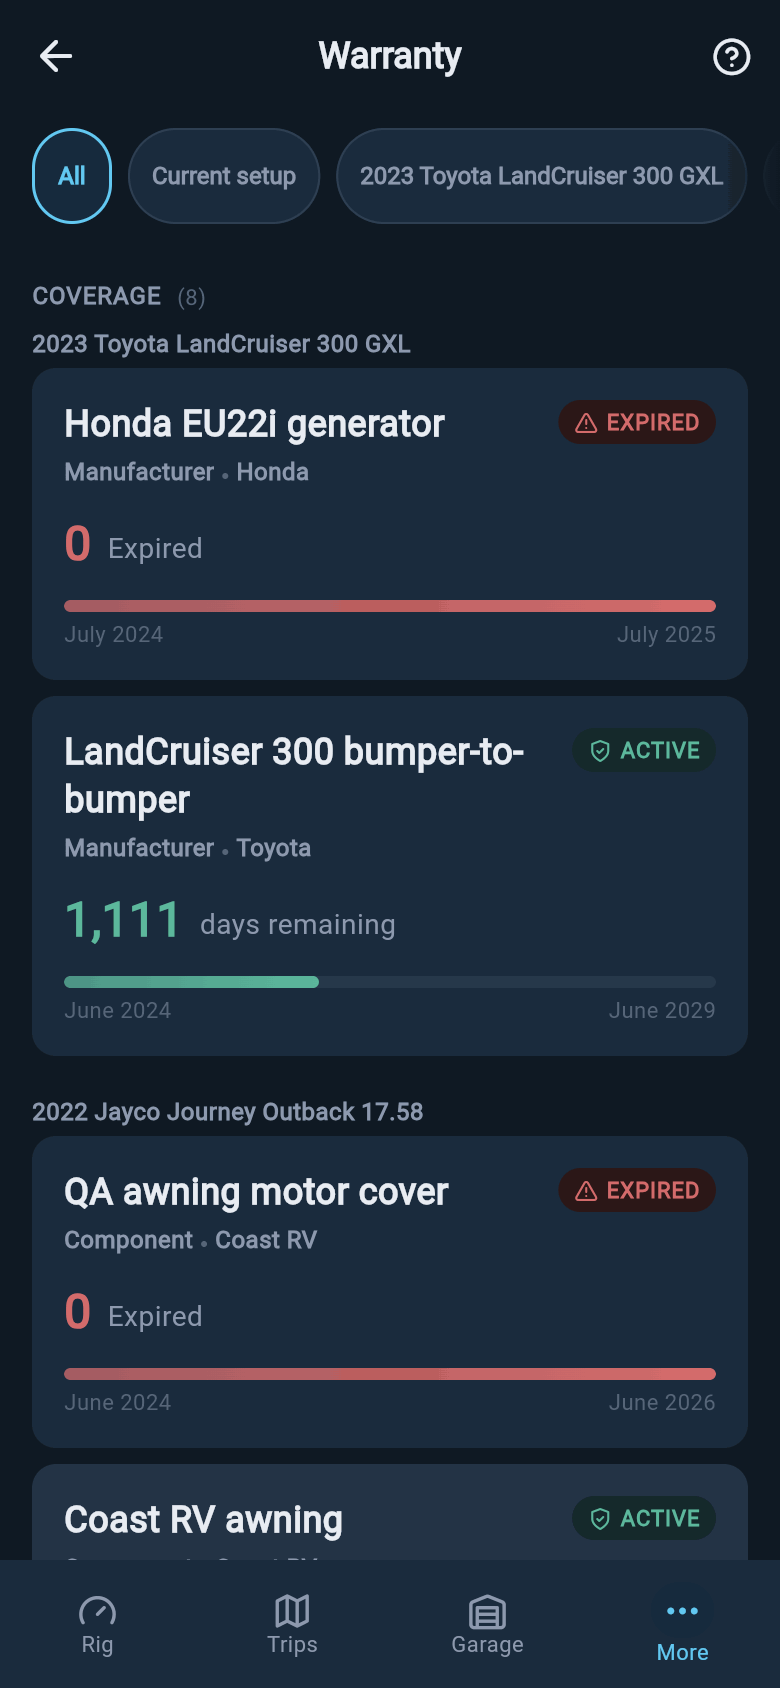
Review or edit a coverage record
Open a coverage record by tapping its card on the Warranty hub, or by tapping the warranty card on a vehicle or trailer’s Health tab. The detail screen shows the cover at a glance, with a colour word telling you whether it has plenty of time left, is getting close, is very close, or has lapsed.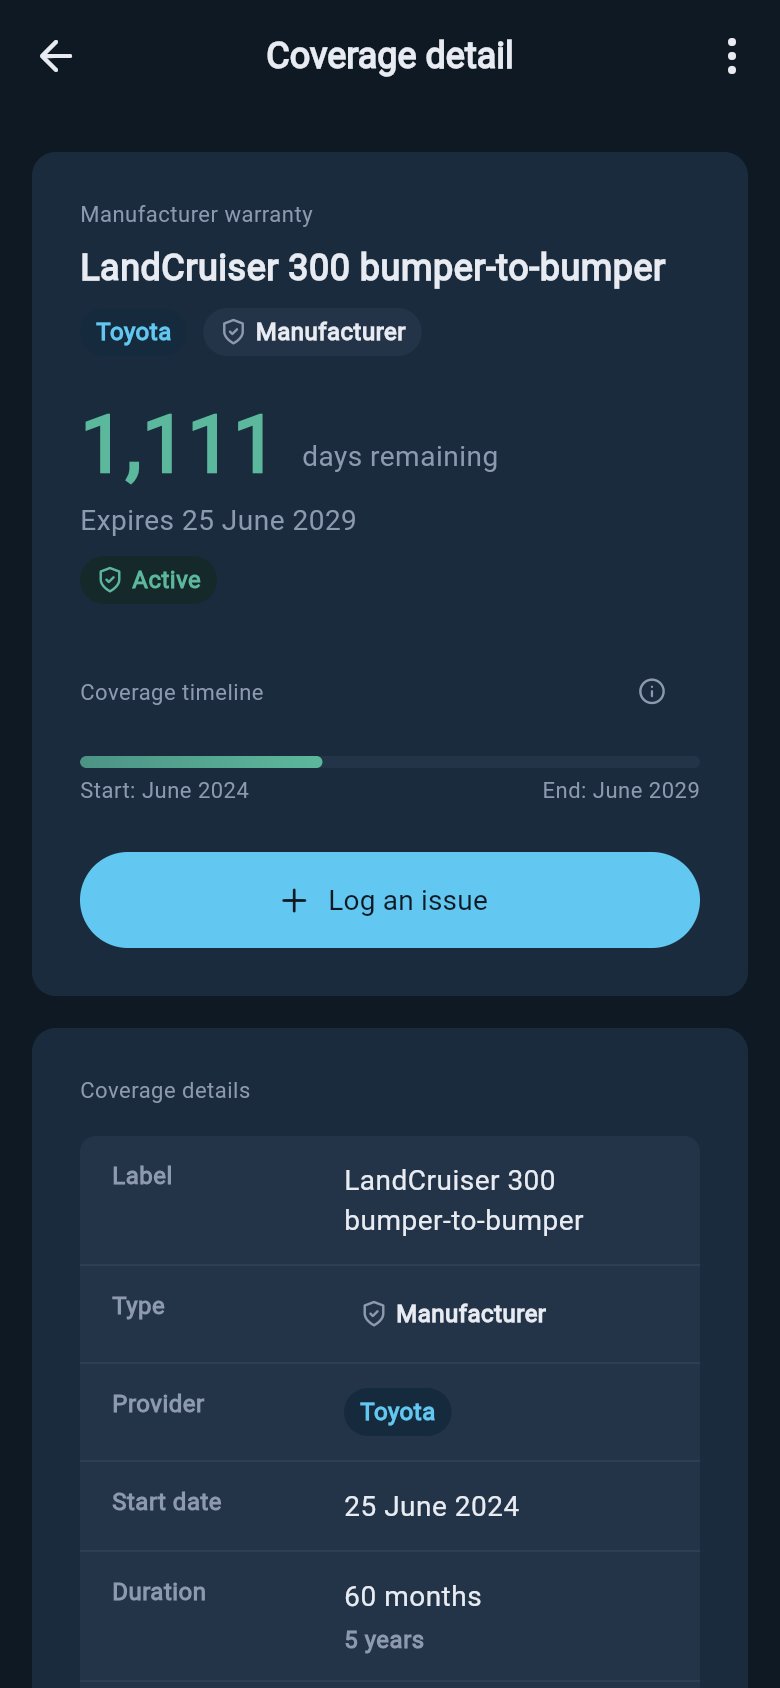
Add cover right after you add a rig
Just after you add a vehicle or a trailer, loadmate offers a warranty card on the success screen with Go to Warranty and Skip for now. The moment you finish adding a rig is usually when the purchase paperwork is still on the table, so it is the easiest time to record the cover.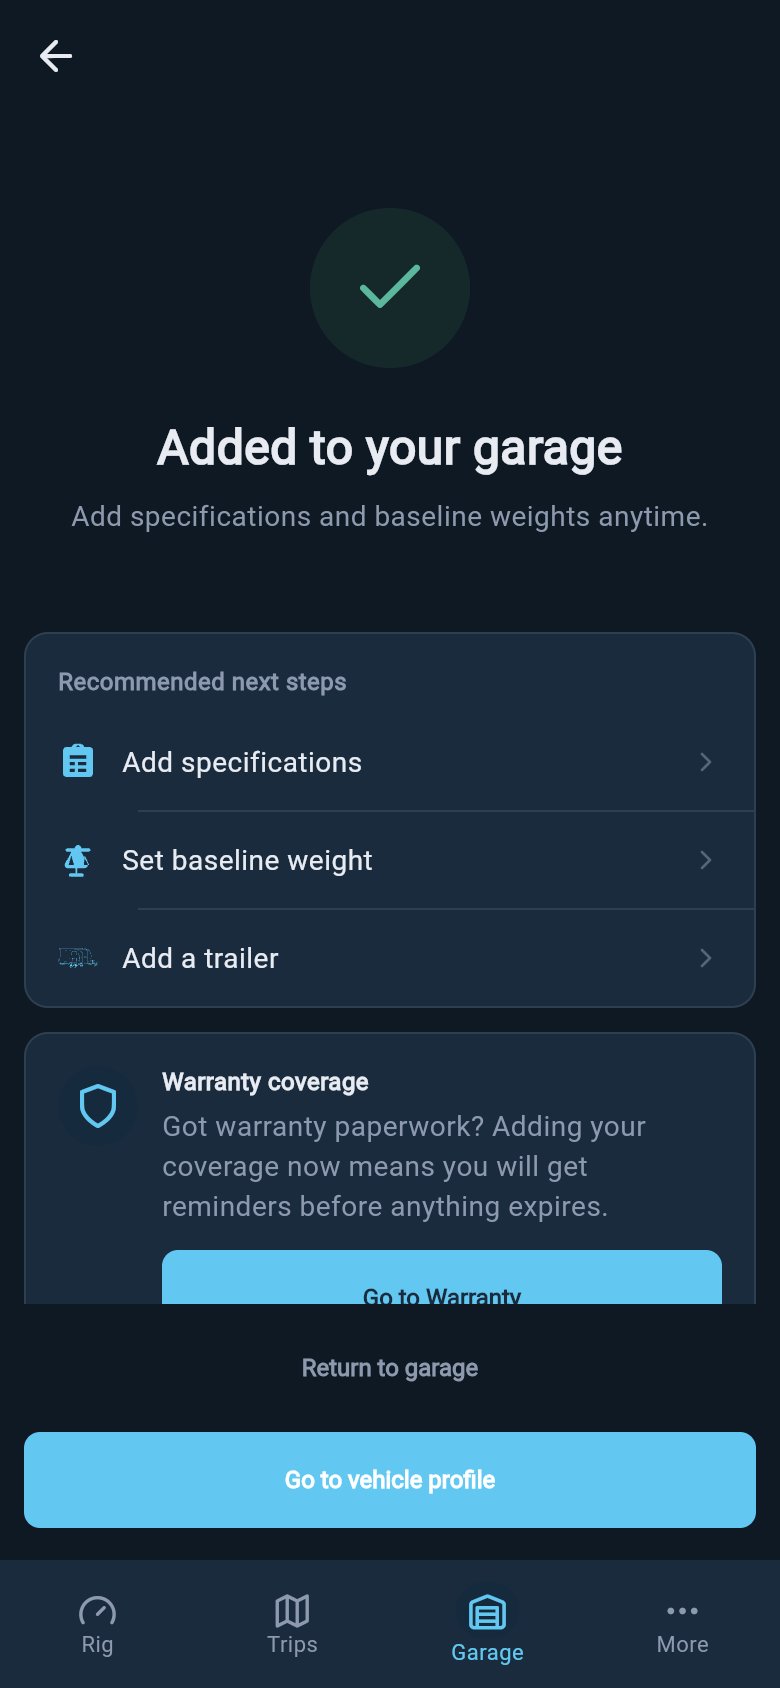
Where to go next
Warranty expiry warnings
See how loadmate counts down to expiry, where the warnings appear, and how to dismiss one you have handled.
Log a warranty issue
Record a problem the moment you notice it, with the date and any photos, and link it to the cover that applies.
Back to the Warranty hub
Return to the one place that holds all your coverage and any logged issues for the rig.
Exploring is free for everyone, including demo and lapsed users: opening the hub, reading every field tooltip, and looking around the Add coverage form are all open. Saving a real change on your own rig — adding, editing, or deleting a coverage record — asks you to upgrade to Pro. Demo data stays visible so you can see how it all looks, but it cannot be edited.