What the tyre profile represents
The tyre profile is the set of tyre details fitted to one vehicle or one trailer. It captures the tyre size, load index, fitted date, manufacturing date if you can read it, tyre count, and a few optional details such as brand, model, speed rating, pressure, and notes. If the tyres on an asset are not all the same, enter the lower-rated tyre so the safety figures stay conservative, and add the difference in the notes field. If you replace the whole set later, use Log tyre change rather than editing old history by hand. The profile sits with the asset because tyres matter when that vehicle or trailer is being assessed. You should not have to hunt through a separate maintenance file to answer a simple question like “how old are these tyres?” or “does this load index still leave enough headroom?”Details to collect before you start
Almost everything you need is printed on the tyre sidewall, so it helps to read one tyre before you open the form. Collect:- Tyre size, the size code on the sidewall, for example 265/70R17.
- Load index, the per-tyre rating number, for example 121. There is an in-app tip showing where this number sits on the sidewall if you are not sure which figure it is.
- Tyre count, how many road tyres are fitted to the asset, for example 4 on a vehicle, 2 on a single-axle trailer, or 4 on a tandem.
- Fitted date, the month and year the tyres went on.
- Manufacturing date from the DOT code, if you can read it. This is optional but worth adding when you can.
Open the Tyres section from Garage
The tyre profile lives inside each asset, not on a separate screen. To reach it, open Garage, choose the vehicle or trailer you want, then scroll to the Tyres section on the asset’s overview. From there you can add the profile, edit it later, or log a tyre change.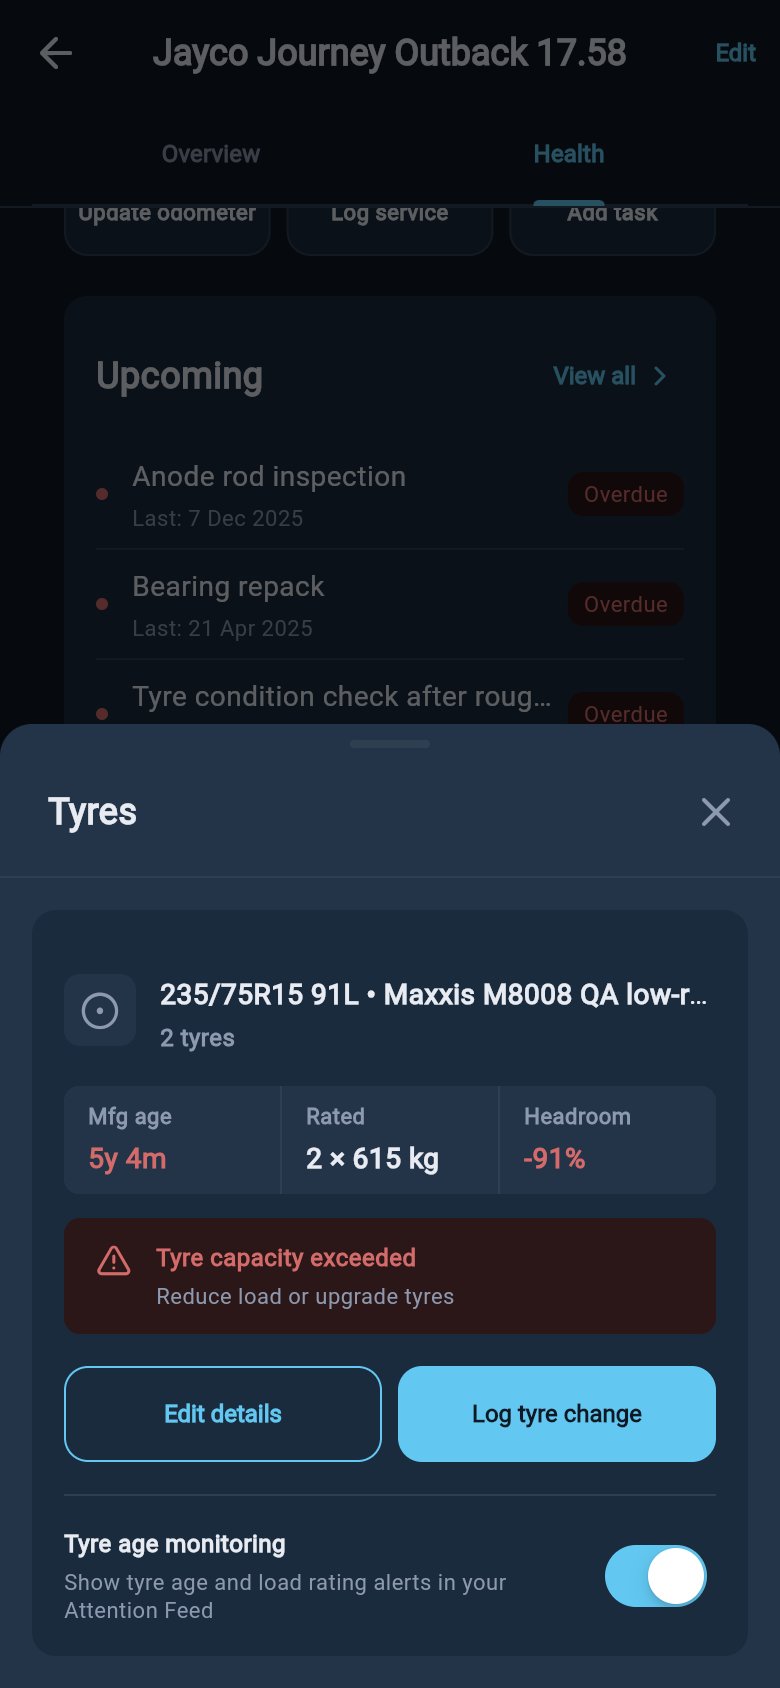
Enter or edit the asset tyre profile
From the Tyres section, open the add or edit form. Enter the tyre size, load index, and fitted date, then set the tyre count. These are the fields the form needs; the rest sit under an optional details section you can expand if you have the information.
Log a tyre change
When the tyres are replaced, use Log tyre change from the Tyres section. This opens a change sheet with the current tyres shown at the top, then fields for the new tyres.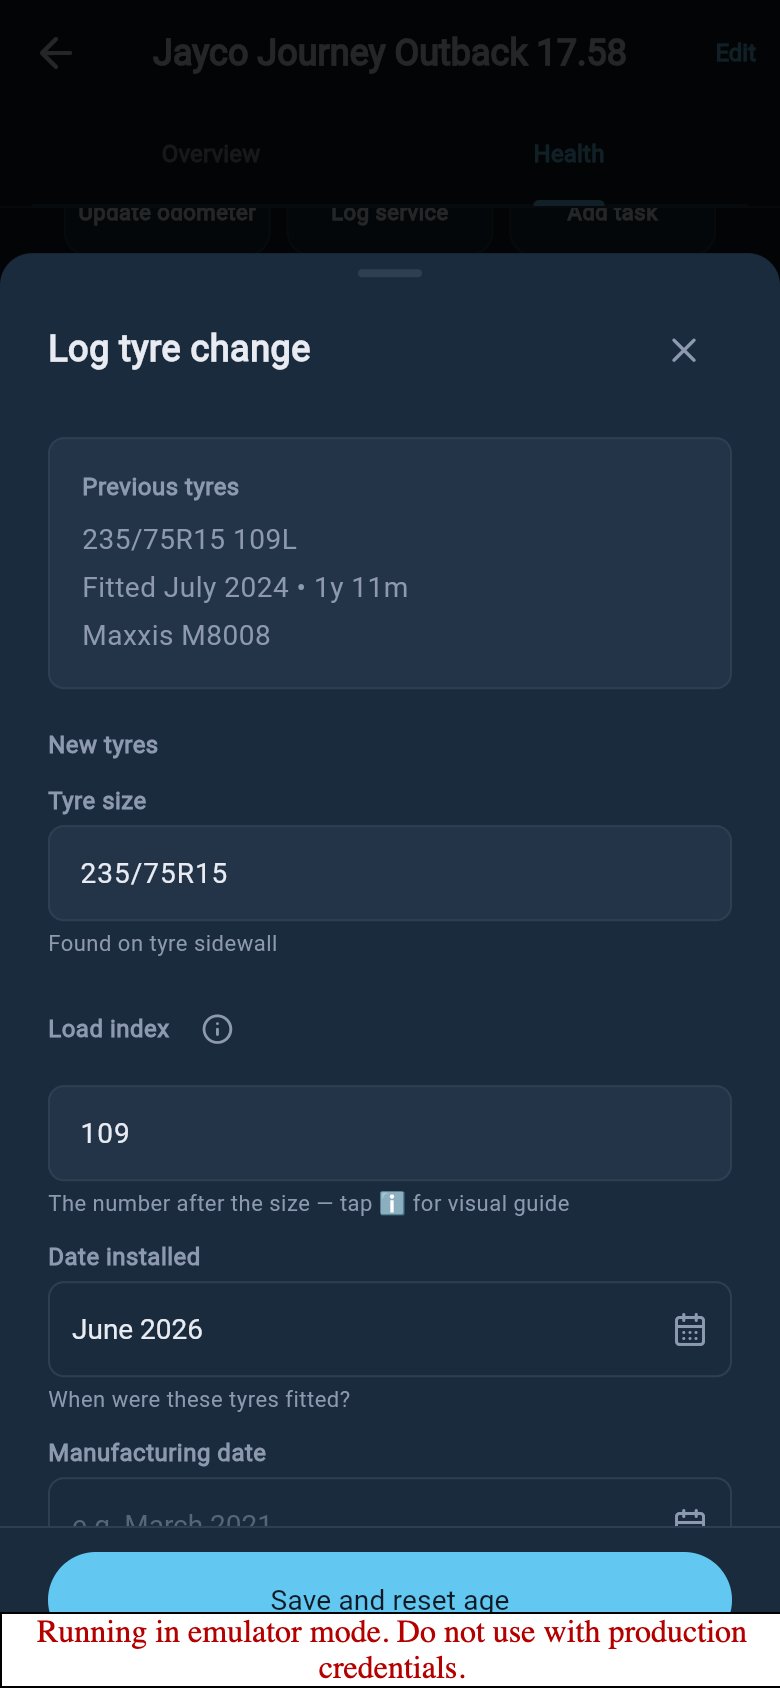
Add the manufacturing date from the DOT code
The manufacturing date tells loadmate when the rubber was actually made, which can be a year or two before the tyres were fitted. Adding it gives a more honest starting point for tyre age than the fitted date alone. You read it from the DOT code on the sidewall. The last four digits are the week and year of manufacture, so 3421 means week 34 of 2021. Enter it as a month and year. If you leave the manufacturing date blank, loadmate falls back to the fitted date for age, so you still get age findings either way; the manufacturing date just makes them more accurate.Tyre age uses the manufacturing date when you provide it, and the fitted date when you do not. Adding the manufacturing date does not clear any other tyre detail you have already entered.
Save and review the Health result
When you save the profile, loadmate stores what is fitted and flags the score and tyre findings to refresh. The next time the Rig and Health surfaces load, they recalculate against the new profile, so the tyre age reading and the load-rating headroom on this asset update to match what you entered. The saved Tyres sheet shown above becomes the place you check the tyres on this asset at a glance: what is fitted, how old it is, and whether the load rating still has headroom against the current load. You should only need to open it again when the tyres change or when you want to correct the source details. For what the figures mean and how to act on them, see Tyre pressure and load. If you have not added the asset yet, start with Add a tow vehicle or Add a trailer.loadmate helps you work from the numbers you enter. Keep your source documents handy, and use a weighbridge, truck scale, or local authority when you need official evidence.