Open the Add Trailer flow
Open the Garage tab and tap Add, then choose Trailer. Your garage holds every vehicle and trailer you tow, and this is where you create a new one. If you have already added a tow vehicle, you can pair it with the trailer afterwards, so it does not matter which one you add first. Browsing the add form is free. Saving a real trailer onto your own rig needs Pro, and loadmate only asks for the upgrade at the moment you save, never before. If you are still exploring the demo rig, the app steps you out of the demo cleanly first so your own trailer is saved to your own garage. To add the tow vehicle as well, see Add a tow vehicle.Add the trailer identity
Give the trailer something you will recognise in your garage. You can enter a nickname, or the make and model, or both — you need a nickname on its own, or a make and a model together. You do not have to track down a model code or a year before you can save, so a friendly name like “the van” is enough to get started, and the rest can wait. Just below the nickname, the form asks you to choose the trailer type before you reach the make and model fields, so look for the type dropdown there rather than further down the page. Choose the trailer type that best matches what you tow. The list runs: caravan, camper trailer, boat trailer, box trailer, fifth wheel, horse float, and other. The type gives the trailer the right identity in your garage, and a fifth wheel uses different towing hardware from an ordinary tow-ball trailer, so the app treats it differently from the start. If none of the options fits cleanly, choose Other and lean on a clear nickname. Further down, after the make, model, year, and registration fields, choose the axle type: single, tandem, or triple. This tells loadmate what sort of axle group the trailer rides on, before you start entering limits, baseline weights, storage zones, and loads. Tap Continue when the identity reads the way you want. This creates the trailer in your garage and takes you to a short success screen.Choose your next step
After the trailer is created, loadmate shows a tick and a recommended-steps card: Add specifications, Set baseline weight, and Set up storage zones. There is no wrong order, so tap whichever you have the documents for right now. If you have already added a tow vehicle and it is your active rig, you will also see Activate this trailer, which hitches the new trailer to your vehicle and opens your Rig screen so you can see the combined picture straight away. If you would rather fill in the details first, choose Go to trailer to open the profile, or skip back to the garage and come back later. Nothing is lost either way.Add specifications
Specifications are the rated limits printed on the trailer’s compliance plate, certification label, manufacturer sheet, or manual. These are the numbers every trailer compliance check is measured against, so enter them straight from the document in front of you. A help banner at the top of the screen reminds you these usually live near the drawbar or A-frame.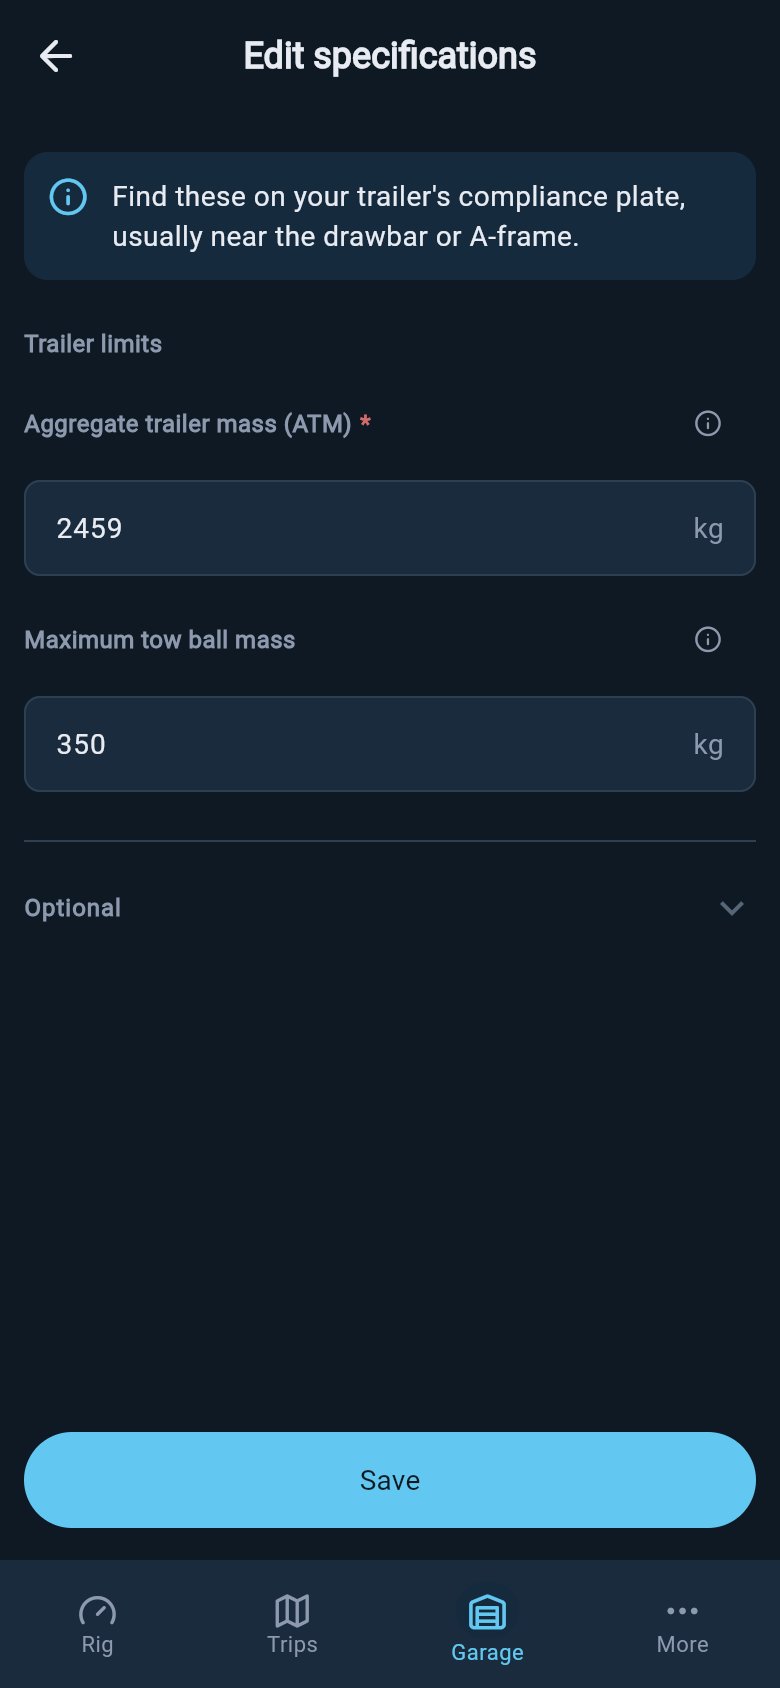
- Trailer laden weight limit — the most the trailer may weigh fully loaded. This is the one required value. It appears as aggregate trailer mass (ATM) in Australia, maximum technically permissible laden mass (MTPLM) in the UK, Trailer GVWR in the US, and GTWR in Europe/international.
- Maximum coupling load — the most weight the coupling may carry. It appears as maximum tow ball mass (AU), maximum nose weight (UK), or maximum tongue weight (US). This one is optional, but worth adding: a trailer can be under its total limit and still over its coupling limit.
| Field | Where to find it | Do not enter |
|---|---|---|
| Trailer laden limit | Compliance plate, certification label, or manufacturer specification | The empty tare weight |
| Maximum coupling load | Coupling label, trailer plate, or manual | A measured tow-ball reading from a loaded trip |
| Axle group or GTM limit | Trailer plate or axle label | A guessed split of the trailer’s total weight |
If a value is missing from your trusted source, leave it blank and come back when you have the right document. loadmate does not look up trailer ratings for you, and a guessed limit is worse than a blank one.
Set the baseline weight
The baseline weight is the empty starting weight loadmate uses before it adds water, gas bottles, tools, food, clothes, bikes, and everything else you pack. For a trailer it needs two parts:- the total empty trailer weight
- the empty weight pressing down on the coupling — the tow ball, nose, or tongue
Factory baseline
Choose Factory when you are working from the manufacturer’s tare, dry, MiRO, or unladen weight. This is the right starting point when you have not yet taken the trailer to a weighbridge. Enter the tare weight in the first field.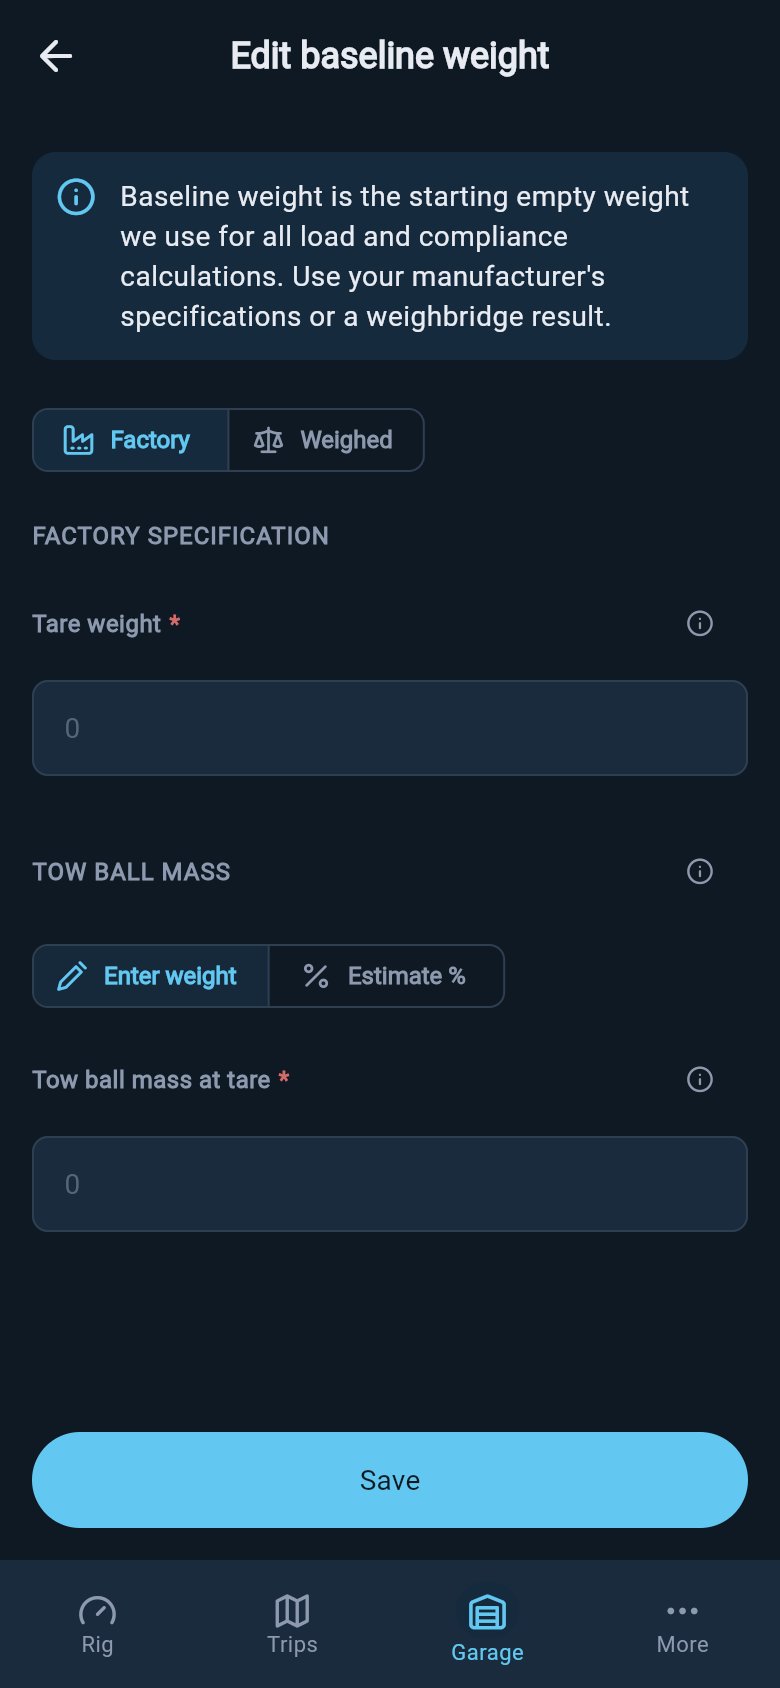
Weighed baseline
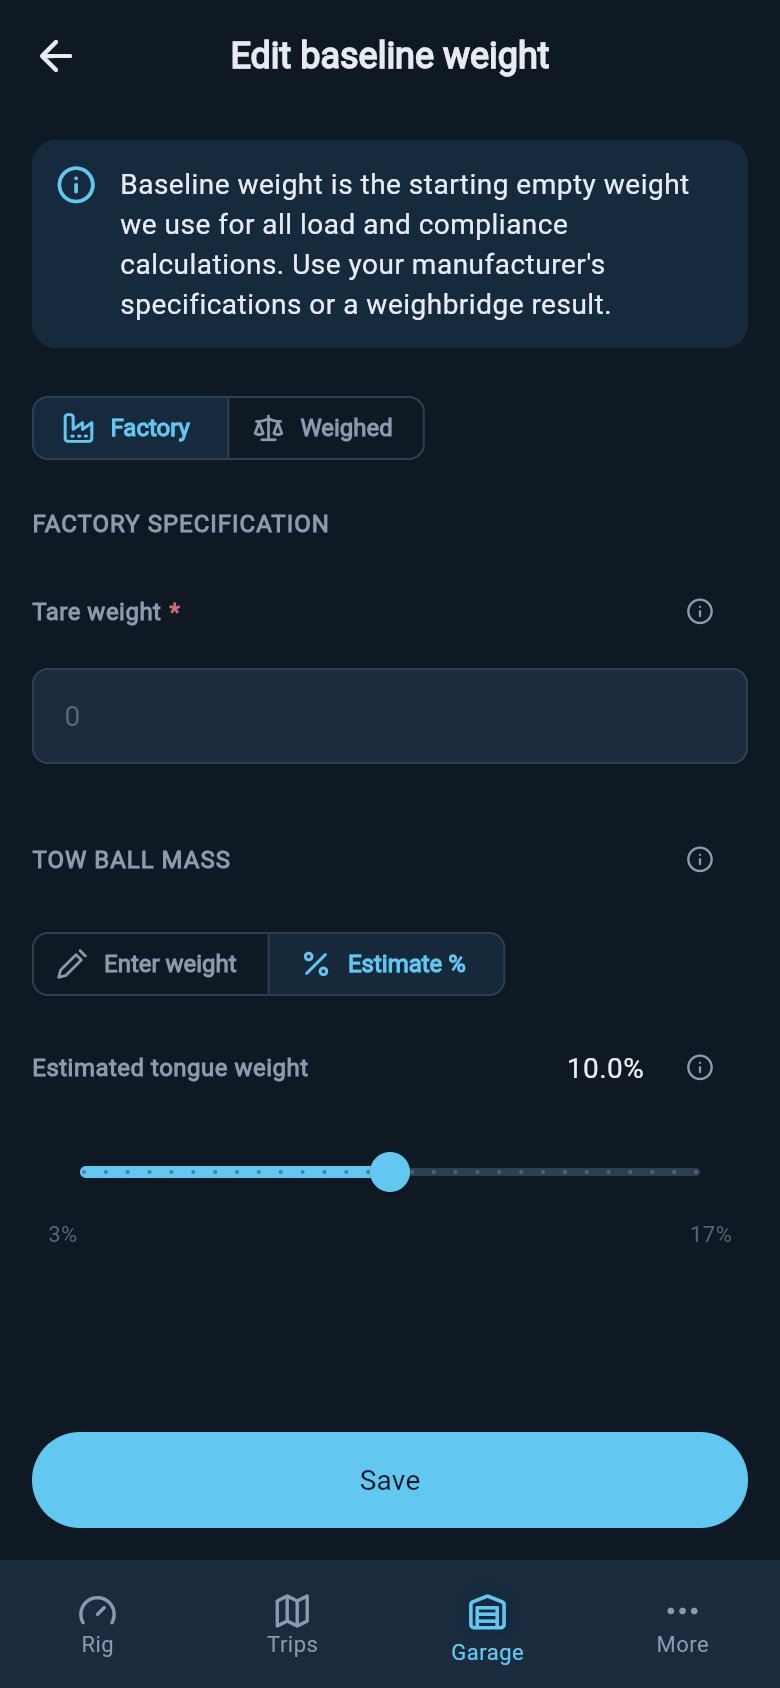
Choose Weighed when you have a result from a weighbridge, truck scale, or professional mobile weighing service. Enter the total measured weight and the date measured so loadmate knows how recent the figure is. If the weighing included a separate tow-ball, nose, or tongue reading, leave Tow ball mass on Enter weight and type it in. This gives loadmate the cleanest possible empty trailer split: total, coupling, and axle group, all measured. If the ticket only gives the total trailer weight, switch to Estimate % until you can measure the coupling. As you slide, loadmate tells you the weight in kilograms or pounds the percentage works out to, so the number stays real to you.
Why the empty coupling weight matters so much
Where weight sits over the axles decides how the trailer tows. Weight kept low and close to the axles helps the trailer track steadily. Too much weight behind the axles lightens the coupling and makes the trailer far more likely to sway — and sway is what turns a routine drive into a frightening one. loadmate can only spot that pattern if it knows the true empty split to start from. That is the whole reason the baseline asks for the coupling weight, not just the total.Finish the rest of the setup
Back on the trailer profile, a setup checklist names the steps still to do. There are three required ones — the specifications, the baseline weight, and the storage zones — and the checklist always points to the next one so your compliance and score numbers stay trustworthy. Set up the storage zones before you start placing loads precisely. Storage zones are the named spots on the trailer — a tunnel boot, a water-tank position, a drawer — and each one’s distance is measured from the centre of the trailer’s axles, so loadmate knows whether a load sits ahead of, over, or behind them. Without zones, the app cannot work out how weight spreads across the axles and coupling. See Set up storage zones.A weight-distribution hitch is not a required setup step in any region. It is optional hardware you can configure later if your rig uses one, and leaving it out does not hold up the checklist or your score. See Weight-distribution hitch.
Where to go next
Set up storage zones
Define the named spots on the trailer so each load sits in a real place and the axle math is accurate.
Weight-distribution hitch
Optional hardware. Configure it only if your rig uses a WDH; it never blocks your setup.
Add a tow vehicle
Add the vehicle that does the towing, then pair it with this trailer to see the combined rig.
Edit ratings
Come back any time to correct a plate value or fill in one you left blank.
loadmate works from the numbers you enter; it never invents a trailer’s ratings or weights. Keep your compliance plate, manual, and any weighbridge tickets handy, and use a weighbridge, truck scale, or local authority when you need official evidence.