> ## Documentation Index
> Fetch the complete documentation index at: https://docs.loadmate.io/llms.txt
> Use this file to discover all available pages before exploring further.
# Import loads from a spreadsheet
> Import loads from a CSV or Excel spreadsheet to add your whole rig at once. Use the loadmate template, map columns, and check the preview before you confirm.
If you have a lot of gear to enter at once, you can import it from a spreadsheet instead of adding items one at a time. Import earns its keep in two situations: a big first-time setup where you are entering your whole rig from scratch, or moving across from a packing list you already keep in your own spreadsheet. For a handful of items, adding them in the app is usually quicker; see [Add a load](/loads/add-load).
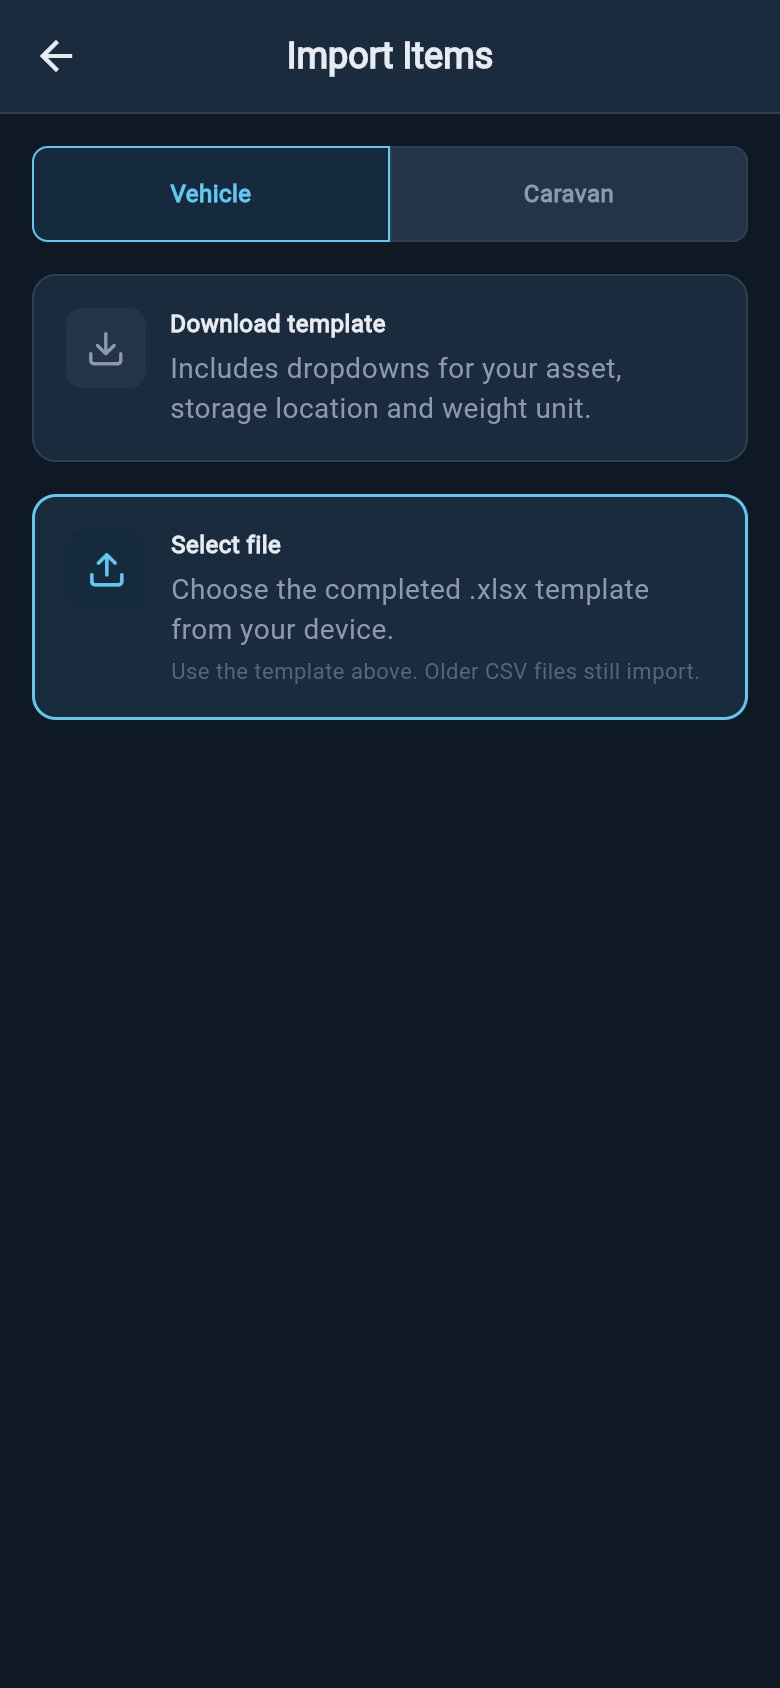
To start, open the loads area and tap Add item, then choose Import from Spreadsheet. The import screen opens with two choices: download the template, or select a file you have already prepared.
## Before you start
Import only **adds** items. It cannot edit, replace, or de-duplicate a list you already have, and there is no overwrite option. If you import the same file twice, you get two copies of everything. So build the spreadsheet complete and correct the first time, and import it into an empty list or one you intend to add to. If a list already has items in it, importing adds to them rather than replacing them.
 The safest way to use import is to get the spreadsheet right before you bring it into loadmate, then check the preview carefully before you confirm.
## Download the template
The template is a ready-made spreadsheet with the correct column headings already in place. Download it, fill in your items, and import it back. Keeping the headings exactly as supplied means loadmate recognises every column without you having to map anything by hand.
The template downloads through your device's Save to Files picker, so you choose where it lands. Open it in any spreadsheet app and fill in one row per item.
The columns are:
| Column | What it does |
| ---------------- | ----------------------------------------------------------------------------------- |
| Item Name | The name of the item. Required — a row with no name is skipped. |
| Weight | The weight of the item, as a number. Required, and it must be greater than zero. |
| Weight Unit | Kilograms or pounds. Leave it blank to use your region's default. |
| Asset | Which vehicle or trailer the item belongs to, by name. |
| Storage Location | The storage zone the item sits in, by name. |
| Category | The kind of item, for grouping (for example Kitchen & Dining, Recovery Gear). |
| Notes | Any free-text note you want to keep with the item. |
| Permanent | Mark Yes for gear that stays on the rig and is not unpacked between trips. |
| Weight Source | Whether the weight is a weighbridge figure (Weighed) or your own figure (Estimate). |
The template also includes helper dropdown sheets that list the valid values for Asset, Storage Location, Weight Unit, Category, and Weight Source. These are filled from your own saved assets and zones, so picking from the dropdowns is the surest way to get names that match. Do not rename the columns or edit the helper sheets.
There are no consumable columns in the template. You cannot set water, fuel, or fill levels from a spreadsheet. Import brings in the item and its weight; you mark which items are consumables and set their fill levels in the app afterwards. See [Water and consumables](/loads/water-and-consumables).
## Fill in your items
Work through the spreadsheet with these points in mind:
* One row per item. Each row becomes one load in loadmate.
* Weight must be a number greater than zero. A row with a missing or zero weight is skipped during import.
* Asset and Storage Location should match the names of your saved assets and zones. Use the helper dropdowns to copy the exact names. If a Storage Location name does not match a saved zone, the item still imports — it just lands unassigned to any zone, ready for you to place later.
* Mark Permanent for gear that lives on the rig permanently, such as a fitted toolbox or a fixed water filter.
* Leave Weight Source blank, or set it to Weighed or Estimate. A blank Weight Source imports as an estimate.
You do not have to fill in every column. Item Name and Weight are the only ones that are required; the rest are optional and can be left blank.
## Import the file
Back on the import screen, tap Select file and choose your CSV or Excel file.
If you used the template and kept the headings, loadmate recognises every column straight away. If your headings do not match — for example you brought your own spreadsheet with different column names — a column-mapping step appears so you can tell loadmate which of your columns is the item name, which is the weight, and so on. This step only shows when loadmate cannot work out the item name and weight columns on its own.
A preview shows what will be imported before anything is saved. It lists every row and reports the totals at the top: how many items will be imported, how many rows carry a warning, the total weight, and how many items will land unassigned. Rows with no usable weight are flagged and are not imported. Rows whose Storage Location does not match a saved zone import as unassigned.
The safest way to use import is to get the spreadsheet right before you bring it into loadmate, then check the preview carefully before you confirm.
## Download the template
The template is a ready-made spreadsheet with the correct column headings already in place. Download it, fill in your items, and import it back. Keeping the headings exactly as supplied means loadmate recognises every column without you having to map anything by hand.
The template downloads through your device's Save to Files picker, so you choose where it lands. Open it in any spreadsheet app and fill in one row per item.
The columns are:
| Column | What it does |
| ---------------- | ----------------------------------------------------------------------------------- |
| Item Name | The name of the item. Required — a row with no name is skipped. |
| Weight | The weight of the item, as a number. Required, and it must be greater than zero. |
| Weight Unit | Kilograms or pounds. Leave it blank to use your region's default. |
| Asset | Which vehicle or trailer the item belongs to, by name. |
| Storage Location | The storage zone the item sits in, by name. |
| Category | The kind of item, for grouping (for example Kitchen & Dining, Recovery Gear). |
| Notes | Any free-text note you want to keep with the item. |
| Permanent | Mark Yes for gear that stays on the rig and is not unpacked between trips. |
| Weight Source | Whether the weight is a weighbridge figure (Weighed) or your own figure (Estimate). |
The template also includes helper dropdown sheets that list the valid values for Asset, Storage Location, Weight Unit, Category, and Weight Source. These are filled from your own saved assets and zones, so picking from the dropdowns is the surest way to get names that match. Do not rename the columns or edit the helper sheets.
There are no consumable columns in the template. You cannot set water, fuel, or fill levels from a spreadsheet. Import brings in the item and its weight; you mark which items are consumables and set their fill levels in the app afterwards. See [Water and consumables](/loads/water-and-consumables).
## Fill in your items
Work through the spreadsheet with these points in mind:
* One row per item. Each row becomes one load in loadmate.
* Weight must be a number greater than zero. A row with a missing or zero weight is skipped during import.
* Asset and Storage Location should match the names of your saved assets and zones. Use the helper dropdowns to copy the exact names. If a Storage Location name does not match a saved zone, the item still imports — it just lands unassigned to any zone, ready for you to place later.
* Mark Permanent for gear that lives on the rig permanently, such as a fitted toolbox or a fixed water filter.
* Leave Weight Source blank, or set it to Weighed or Estimate. A blank Weight Source imports as an estimate.
You do not have to fill in every column. Item Name and Weight are the only ones that are required; the rest are optional and can be left blank.
## Import the file
Back on the import screen, tap Select file and choose your CSV or Excel file.
If you used the template and kept the headings, loadmate recognises every column straight away. If your headings do not match — for example you brought your own spreadsheet with different column names — a column-mapping step appears so you can tell loadmate which of your columns is the item name, which is the weight, and so on. This step only shows when loadmate cannot work out the item name and weight columns on its own.
A preview shows what will be imported before anything is saved. It lists every row and reports the totals at the top: how many items will be imported, how many rows carry a warning, the total weight, and how many items will land unassigned. Rows with no usable weight are flagged and are not imported. Rows whose Storage Location does not match a saved zone import as unassigned.
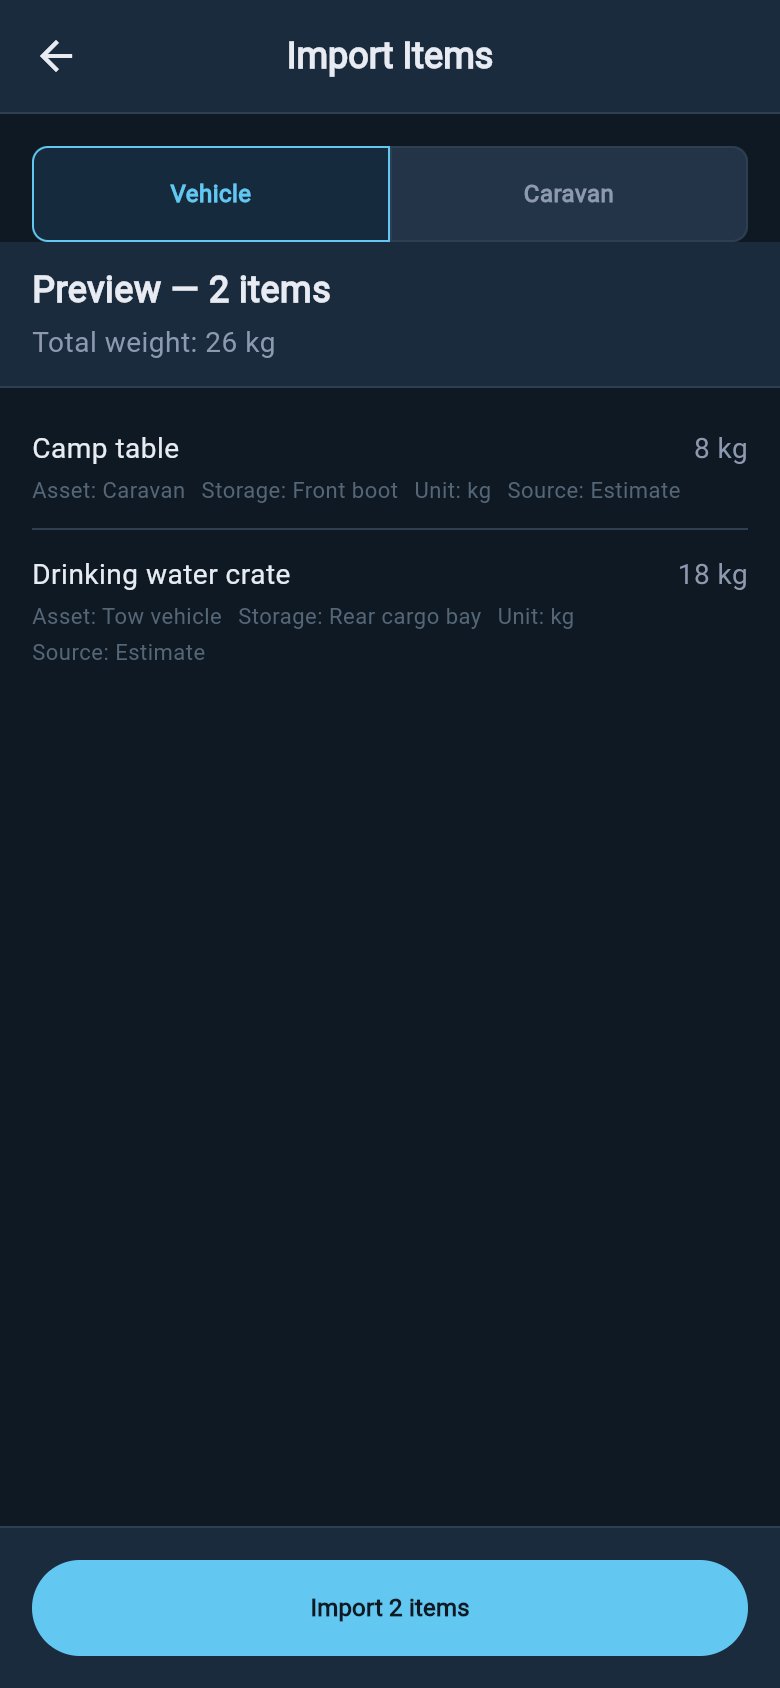 Read the preview carefully, because this is your last check before the items are added. If something looks wrong, go back, fix the spreadsheet, and select the file again. When the preview reads the way you want, confirm to import. Importing your own loads requires Pro.
## After importing
Once the import finishes, loadmate tells you how many items were added, how many were skipped, and how many landed unassigned. A few short steps finish the job:
Assign zones to any unassigned items, so loadmate knows where the weight sits across the axles and the coupling.
Mark any consumables and set their fill levels. Import cannot do this; see [Water and consumables](/loads/water-and-consumables).
Open the Rig tab to bring your score up to date against everything you just added.
To see exactly what changed and how it affects the saved rig, see [Review load changes](/loads/load-changes).
## What import cannot do
Import is a fast way to add a lot of items at once, but it is deliberately limited. It cannot:
* Edit or replace loads you already have — it only adds.
* De-duplicate. Importing the same file twice creates duplicates.
* Set consumables or fill levels. Water, fuel, and fill levels are set in the app after import.
Importing your own loads is a Pro feature.
Add gear one item at a time in the app — usually quicker for a handful.
Mark items as consumables and set their fill levels after import.
See exactly what changed and how it affects the saved rig.
Browse common items to add by name instead of typing every weight.
Read the preview carefully, because this is your last check before the items are added. If something looks wrong, go back, fix the spreadsheet, and select the file again. When the preview reads the way you want, confirm to import. Importing your own loads requires Pro.
## After importing
Once the import finishes, loadmate tells you how many items were added, how many were skipped, and how many landed unassigned. A few short steps finish the job:
Assign zones to any unassigned items, so loadmate knows where the weight sits across the axles and the coupling.
Mark any consumables and set their fill levels. Import cannot do this; see [Water and consumables](/loads/water-and-consumables).
Open the Rig tab to bring your score up to date against everything you just added.
To see exactly what changed and how it affects the saved rig, see [Review load changes](/loads/load-changes).
## What import cannot do
Import is a fast way to add a lot of items at once, but it is deliberately limited. It cannot:
* Edit or replace loads you already have — it only adds.
* De-duplicate. Importing the same file twice creates duplicates.
* Set consumables or fill levels. Water, fuel, and fill levels are set in the app after import.
Importing your own loads is a Pro feature.
Add gear one item at a time in the app — usually quicker for a handful.
Mark items as consumables and set their fill levels after import.
See exactly what changed and how it affects the saved rig.
Browse common items to add by name instead of typing every weight.